Thank you @iCFO, but this one could be done manually right? Is there a way to automate those pixel fixing?
Those 1 time manual steps are just to initially setup the excel template file (which is always a manual process), but then all of those changes to the template can be used to generate new excel files with the template formatting and cell sizes that won’t require any manual changes after they are written via KNIME.
The only real required changes on the Excel side are to correctly size the column and row to the ratios and pixels of the image. If you had no idea which column or cell an image might appear in different scenarios, then you might need to use visual basic and excel to resize the cell to fit the image.
1 Like
Thank you @iCFO, I’ve tried your workflow and it seems clear than before.
I have only two questions:
-
Just want to conform, how did you get the pixels width and height in image - is it in images → right click → properties? See screenshot if I got it correctly. If yes, does it manually need to check the width and height every image or no need?
-
For excel file, tried finding the resizing of cell in excel but didn’t get it. May I know where should I change it in excel to match with the image? Thank you so much!!

Also, just want to know this advanced technique that you have ![]()
How did you connect the screenshot without the path? Can’t figure out how and where is the image came from but if I execute it, it is there.

And not sure why your Write to Excel Template is showing like this even though I have it in my KNIME.

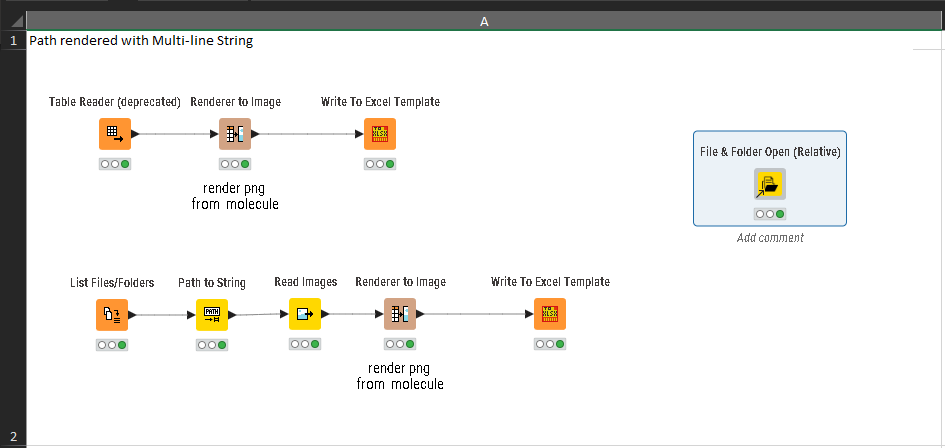
If all of your screenshots are not the same pixels and dimensions then you should use KNIME to extract them, then use the pixel sizes in the render node via flow variables for ping width and png height. I will see if I have an old workflow that processed a group of images with varying pixel dimensions.
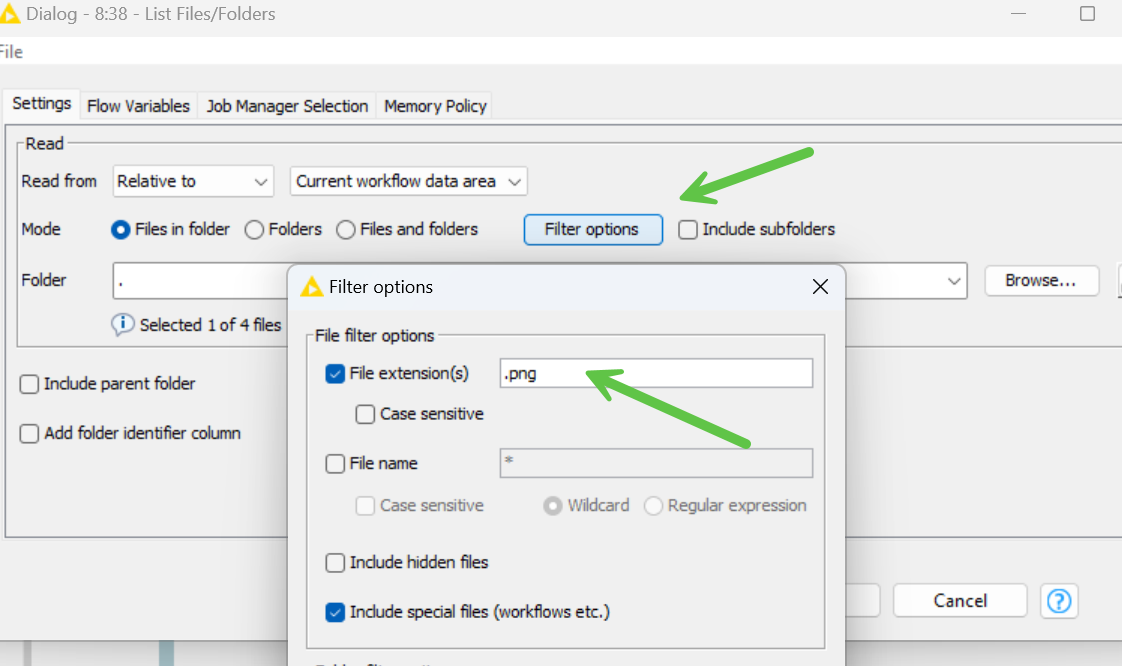
I am reading in all images that match the filter options with that “list files / folders” node, click on “filter options” to see the settings.
The appearance of the Excel Write to Template node is likely caused by my workflow being created in a newer version of KNIME AP (I am using 5.3). Try using yours. I didn’t use any advanced settings on that node.
1 Like
I think it is important to understand how you are actually trying to use this in an end result before going much further. Will there be an entire column of screen-shots or a single one? Will they have similar proportion ratios in height and width? How will they be used in the excel file?
1 Like
Thank you for all your inputs @iCFO, just one last question before I close this post ![]()
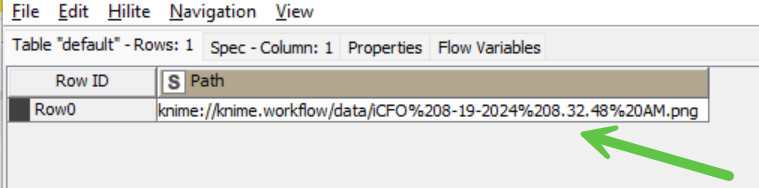
Still confused how did you stock the image in the workflow? Still can’t find it where it is even though I found the filter options that read images and the path itself under Path to String node. Hope you could share where it is or how did you do it so next time I am able to read it properly. Thank you so much again!
I think I found it @iCFO - but just want to confirm, did you manually paste the image inside the data folder of the workflow?

@trafalgarlaw isn’t it that most screencapture tools allow the option to automatically save images into certain folders?
Agree @mlauber71, actually i am just askin @iCFO regarding the images he linked in list files/folder wherein it is saved in a workflow itself.
Yes. I manually pasted the image file and the excel template into the workflow data folder for portability with the shared workflow. I used the filter options to target all png files because I originally built it to read several images into a column.
Executing my component will open the folder on your local computer once you save the workflow locally.
3 Likes
Superb, thank you for all of your help @iCFO! Amazing!! Great appreciate your inputs! ![]()
1 Like
This topic was automatically closed 7 days after the last reply. New replies are no longer allowed.