Hi @MartinDDDD
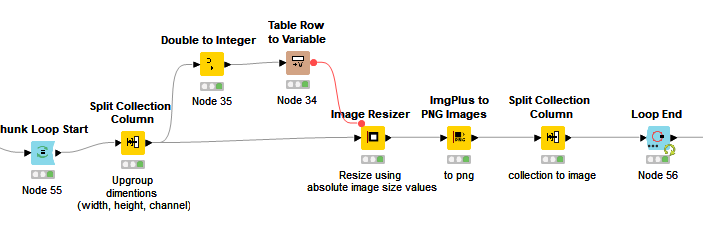
At first, I encounterd the same problem when I used renderer to image node. As @gonhaddock and @sryu suggested, getting the dimentions of images by 'Image Properties’ node, then using the “ImgPlus to PNG Images Node” to convert to png could solve the problem. My workflow might be helpfull as I think it has all those processes in it.
Hi @tark
I don’t think your workflow requires “Image Resizer” before “ImgPlus to PNG Images”, and the loop node.
What is the need to use Image Resizer twice?
Thanks, @sryu. You are right. I found that the Image Resizer was used redundantly. Simply using imgPlus for PNG images and Split Collection Column would be sufficient. I have updated my workflow as shown below."
@tomljh @gonhaddock @sryu @tark:
Thanks a lot for looking into this and the feedback :-). Will look into it and see if I can adjust.
I already used the Image Properties Node to extract dimensions, but maybe that’s from the wrong image - let me check ![]()
I don’t want to complicate the problem. Here I divide the problem into two:
-
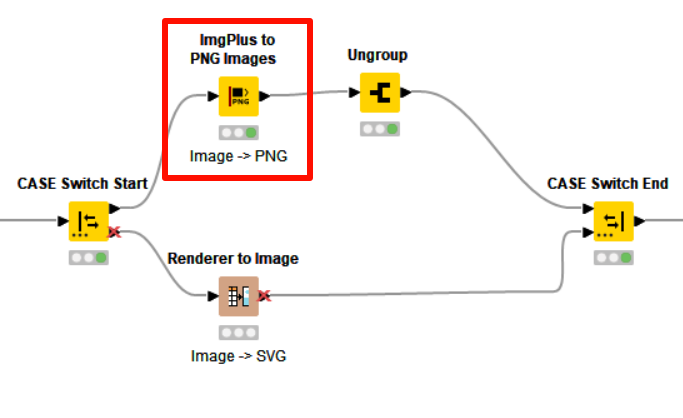
Under the current conditions, if a jpg image is to be converted to a png image, my opinion is the same as everyone else’s. The recommended method is still to use the “ImgPlus to PNG Images” node to complete it.
-
Now let’s discuss why “Renderer to Image” node cannot complete the conversion from jpg image to png image well.
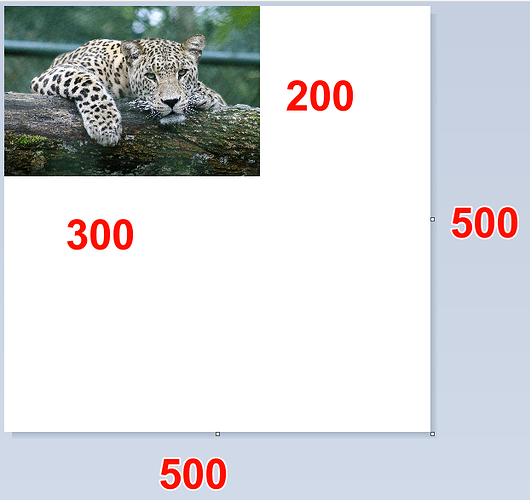
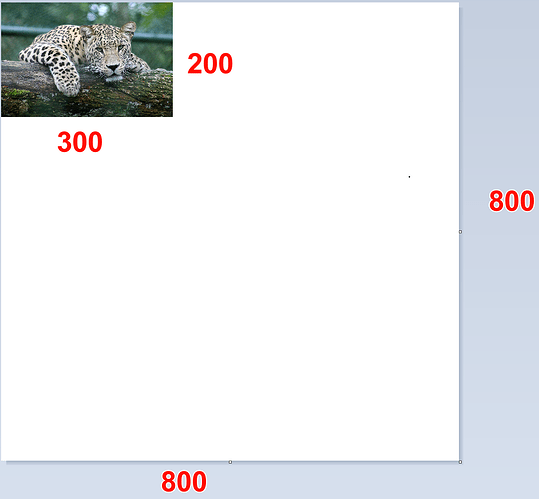
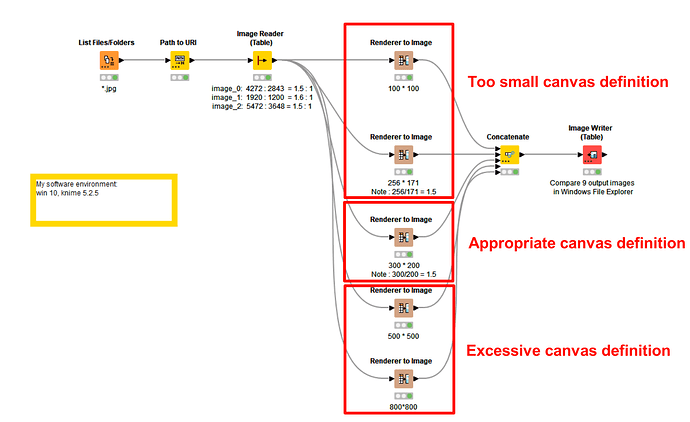
Inspired by @gonhaddock , I found that the definition of the image size in this node actually defines a canvas and cannot directly affect the size of the png image.
Inside this node, the actual transformation of a fixed height of 200 and 200 multiplied by the aspect ratio is completed. For example: a fixed height of 200 and an aspect ratio of 1.5:1, then X and Y are 300 and 200 respectively. At this time, defining a 500, 500 canvas can accommodate the output png image, but because the canvas is too large, the image has blank edges.
By comparing these two outputs, it can be known that the output png is always 300*200 in size, while the settings in the node configuration only change the size of the canvas.
Thanks for the explanation - what I’m not getting is that if I resize my image to say 1000 x 2000, the extract the dimension of the resized image (e.g. 1000 x 2000) and pass them to the Render to Image Node as flow variables to define pngWidth & pngHeight - should the canvas that gets created exactly fit the image?
I notice this behavior only in the scenario where the image is not resized at all or where I resize it by a certain factor (e.g. 0.5 to half width/heigth) - in my 150x150 scenario it actually turns out as expected ![]()
Have not tried yet what seems to be the road of least resistance which seems to be ImgPlus to PNG Images node, but that’s what is going to happen next :-).
I join @rfeigel 's club of “image processing not the strongest suit” ;-).
/update - the ImgPlus to PNG Images works like a charm - one more Case Switch though, but at least all scenarios now work as expected ![]()
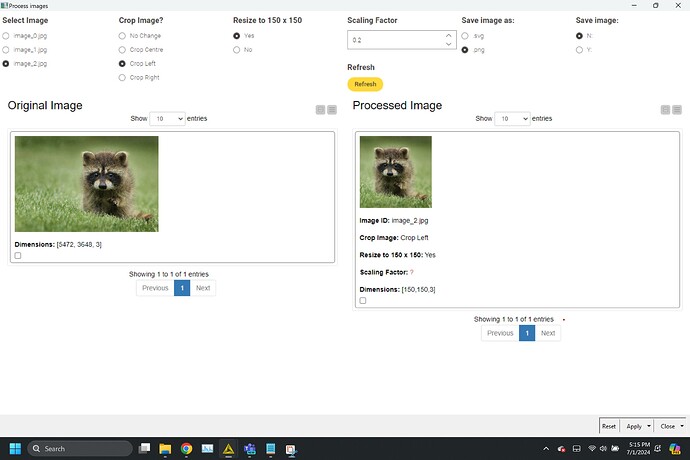
my submission to challenge -JKI-S3C7 – KNIME Community Hub
![]() Here’s our solution to last week’s Just KNIME It! challenge!
Here’s our solution to last week’s Just KNIME It! challenge! ![]()
Like many of you, we also made the components themselves configurable with some Configuration nodes! ![]() Thanks for the different contributions and for diving into a topic that we don’t explore so often!
Thanks for the different contributions and for diving into a topic that we don’t explore so often!
![]() See you tomorrow for a new challenge.
See you tomorrow for a new challenge.
Thank you @alinebessa for this great challenge, completely new field for me, but was pretty challenging and a great experience.
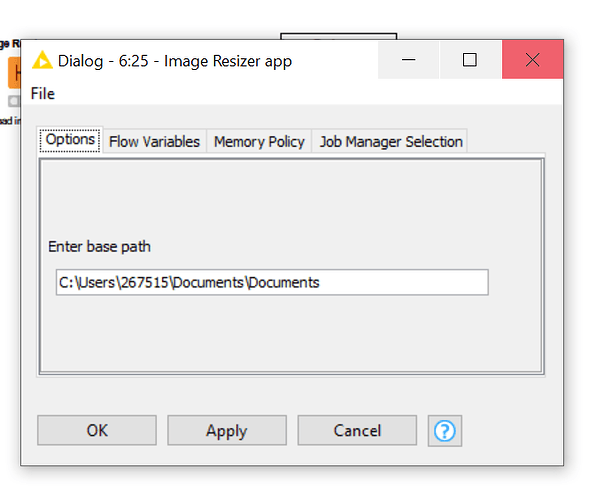
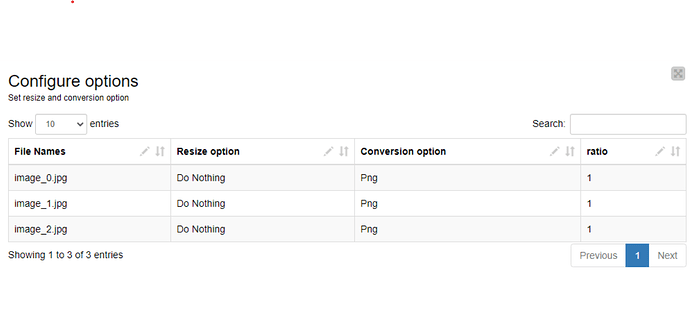
I worked around a pretty basic solution that can be found here, with all the configuration options being
- a string input for the final folder destination
- a table input for all the files input
Currently , my workflow just allows for downloads/ write to folder, will try to improvise it with the different solutions here.
Confirming that your initial hypothesis, that is how I have structured my workflow!
This topic was automatically closed 90 days after the last reply. New replies are no longer allowed.
