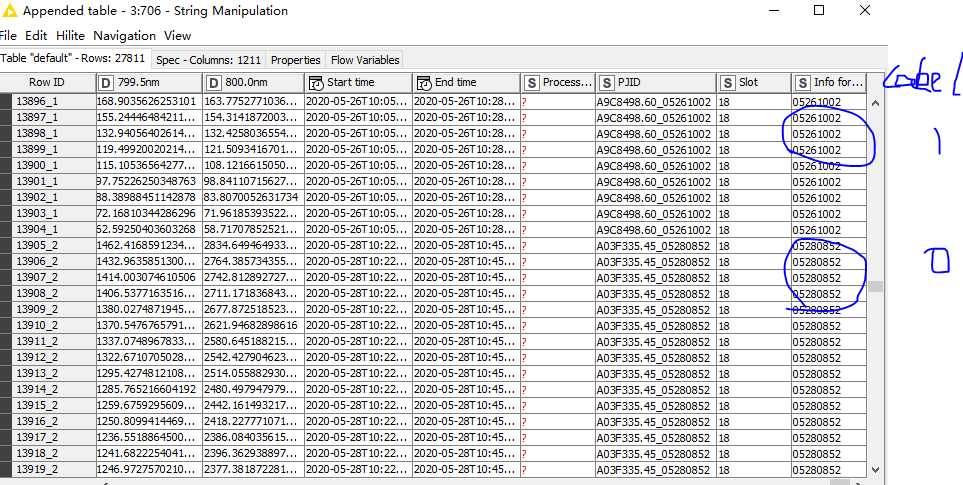
I want to add label by column(Info for config) value, if the value=** ,then add a new column(“Label”), and record as 1, else record 0, how can I do that? Can someone help me? Since I am not familiar with KNIME and java, your answer will be highly appreciated.
Hi @Turkeyhazel , and welcome to the community.
When you say “if the value=**”, I take it you mean that the value is a specific literal value, as in your example you indicate that you want 05261002 to result in your new label column to be populated with a 1, and for it to have 0 in all other cases?
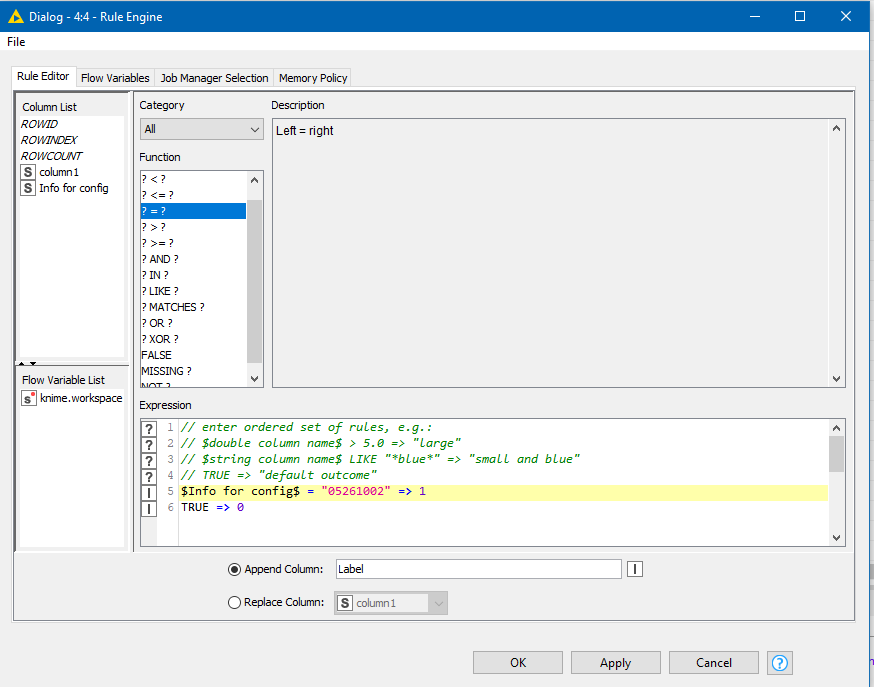
If my understanding of what you are asking is correct, then this can be achieved easily using a Rule Engine with the following rule:
$Info for config$ = "05261002" => 1
TRUE => 0
and tell it to Append Column “Label” as follows:
I have a feeling though that maybe your requirement isn’t quite this, and that there is actually something more that you are really wanting here, so please elaborate further if this doesn’t provide the solution you are looking for.
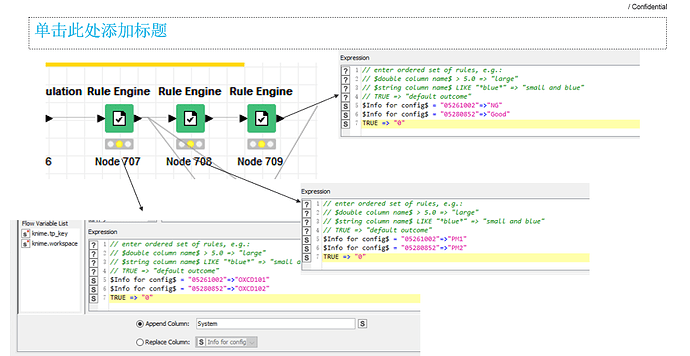
Thanks takbb, it works, if i want to add 3 column, currently i add Rule engine 3 times, but i think there should be better way to do this, could you pls help to advice? Maybe one Rule filter is okay to do this
Hello @Turkeyhazel,
and welcome to KNIME Community!
To add more columns with one node you can use Column Expressions node. It uses a bit different syntax than Rule Engine. Take a look here:
Also please don’t ask in/open more than one topic for same issue.
Br,
Ivan
Hi @Turkeyhazel , and welcome to the Knime Community.
I agree with @ipazin , if you want to avoid multiple Rule Engine, you can use Column Expressions. It looks like you are using the same conditions in all 3, but you are probably creating 3 columns, correct?
Also, as @ipazin mentioned, please do not ask in/open more than one topic for same issue 
Hi @Turkeyhazel ,
I would often go for using multiple nodes rather than code-nodes as it “documents” the workflow, but I also understand that for a large number of columns being appended, that doesn’t scale too well if you are having to write an individual rule engine for each one.
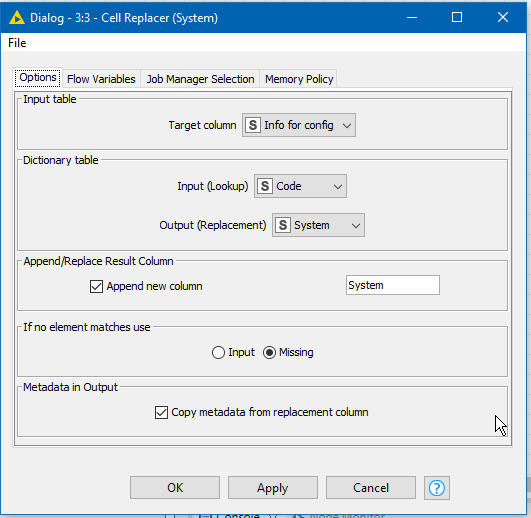
That said, if the purpose of the rule engines is purely to act like a lookup table, then using an actual lookup table along with a series of Cell Replacer nodes might be another option. It doesn’t cut down on the nodes, but it does cut down on the typing and is potentially more easy to maintain.
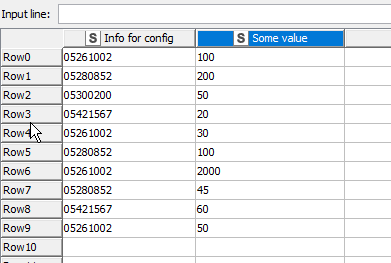
Here I have some sample data:
And a lookup table, that contains the values to be applied for each of the “code” values:

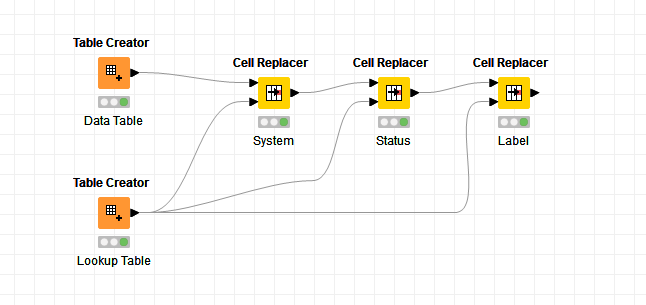
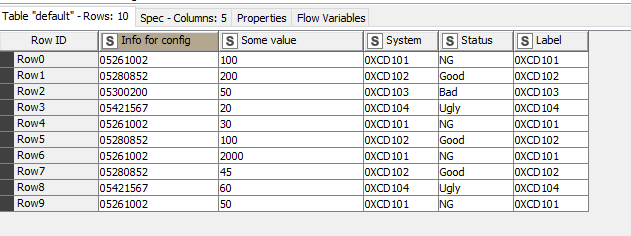
A series of Cell Replacers then lookups up the “Info for config” value in the lookup table, returning the appropriate column into a new column. So you then just have to supply the “output column” to be retrieved and name to append for each:
e.g.
The end result is this:
Append Lookup Value.knwf (12.0 KB)
Hey @takbb , how do you create this type of components?
That is:
- Add a logo
- Make the component exportable - I usually can export a workflow containing the component, but cannot export a component on its own.
Hi @bruno29a,
I’m pleased you asked! 
Adding a logo/icon
You need to create a 16x16 png file. I use good old Microsoft Paint (nice and simple but it works) to edit the file:
e.g.
I have a folder dedicated to writing “custom icons” now, and its one of the most satisfying parts of writing a component 
You can save any of the following images I’ve uploaded here to a folder and they can be used as a template
![]()
![]()
![]()
![]()
![]()
![]()
![]()
![]()
![]()
![]()
![]()
After that you just have the fun of trying to convey any kind of meaning out of a 16x16 grid! 
Once you’ve perfected your master piece, apply it to the component by “opening your component”
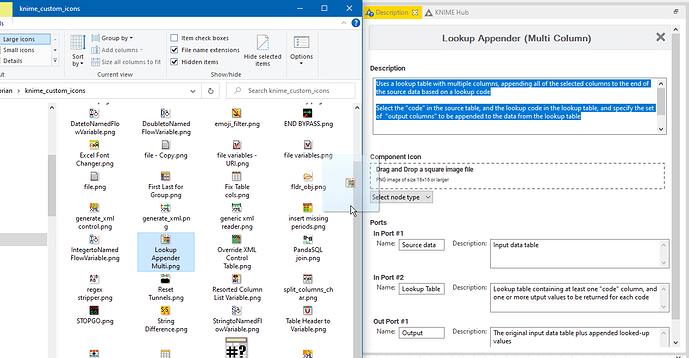
Click somewhere on the component’s “desktop” background and open the description for the component and click the edit icon:
then drag your new icon from explorer onto the “Component Icon area”
Finally, (optional) change the background colour to one of a preset range by using “select node type”
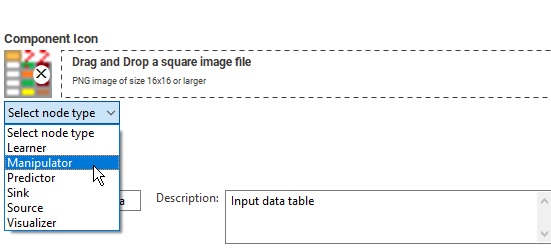
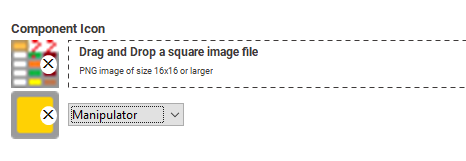
And remember to save! …
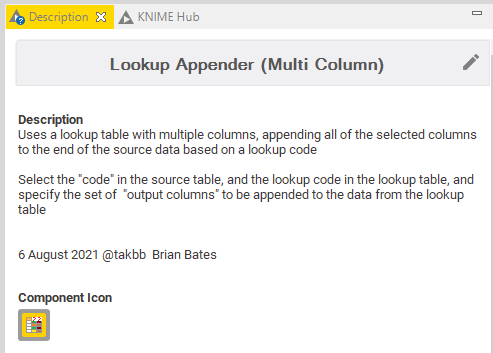
Sharing the component on the hub
You do this step from back on your workflow that contains the new component.
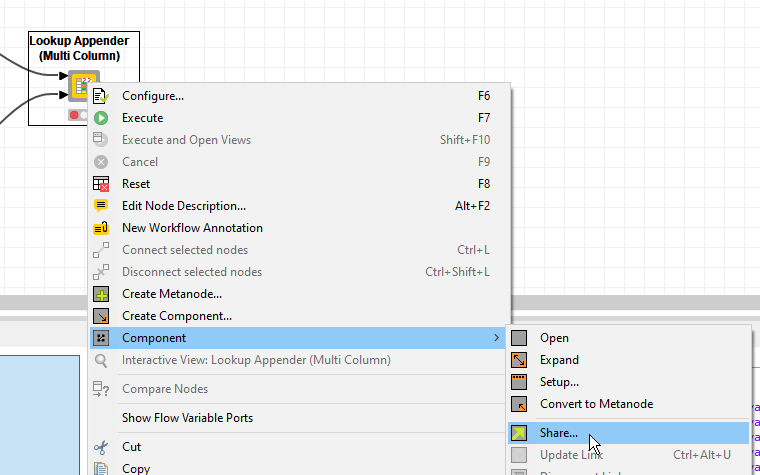
To do that, you “share” the component
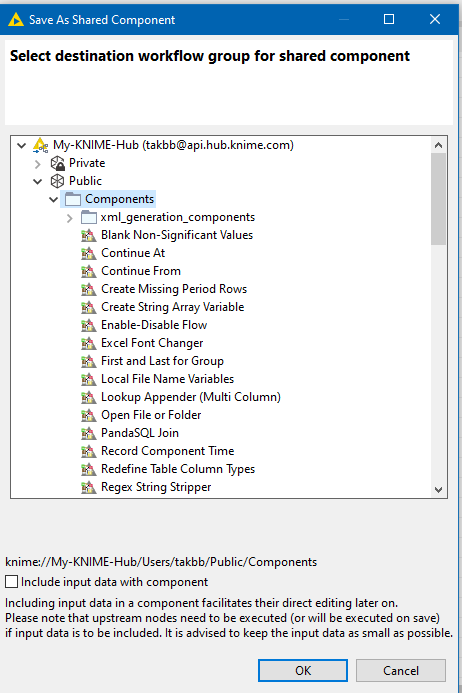
Provided you are logged in to the hub, you can share it directly to your public area
and then you tell it whether you want to link the component in your workflow to the “shared” copy you just made public, in which case if you ever change the public copy, the local one in your workflow would update when it checks. You might want to leave it unlinked. You can always unlink it at a later date should you wish.
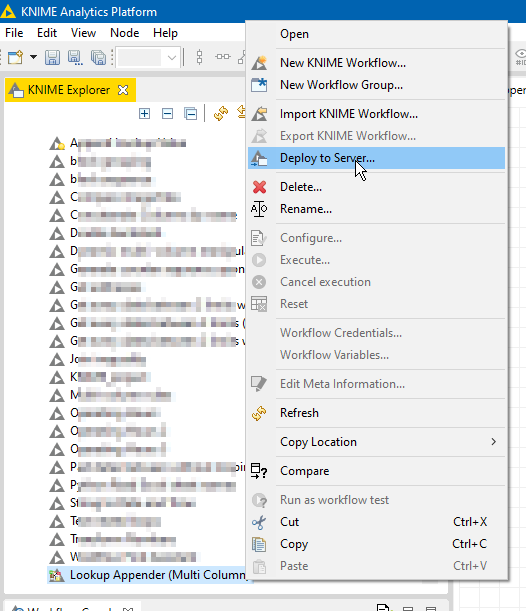
If you choose to share it to a local folder, then it will be available just for your own use, but if you subsequently wish to make it public you can just right click on the component in the KNIME Explorer and select “deploy to server” (if you are logged in to the knime hub)
and then once again choose somewhere in your Public area on the hub.
Hope that helps!
And if KNIME had the ability to include Components in the “Node Repository” or had a “Component Repository” window… my life would be (almost) complete! 

Thank you so much @takbb for the, as always, detailed explanation.
I still use ms paint for posting images/screenshots here, as it’s light, though limited but for the kind of screenshot edit that’s needed, it’s good enough.
I have deployed components to a Knime server before, that I was able to do, so I’m guessing it works the same when deploying to the hub - I’ve not done this yet, but have started looking into it last week with guides from @ipazin and @ScottF .
Thanks again, I will look into it.
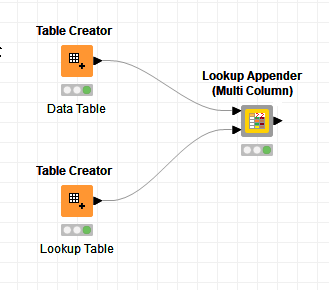
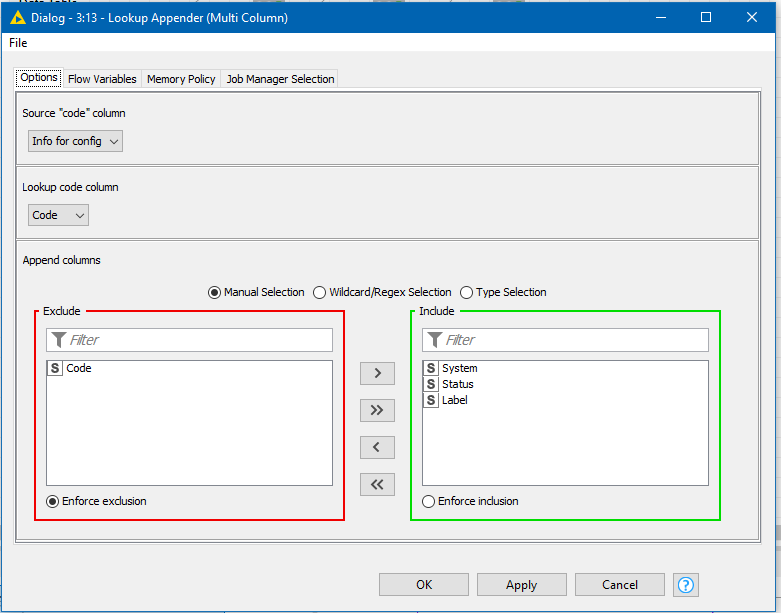
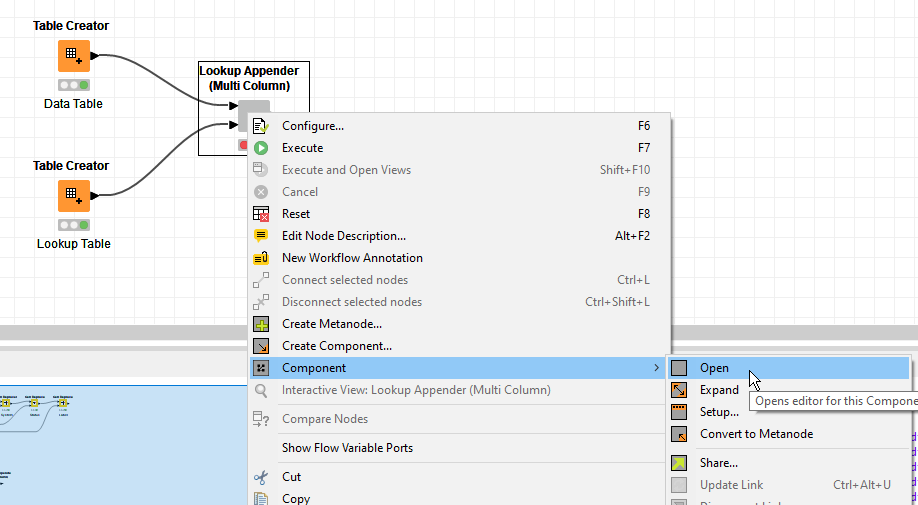
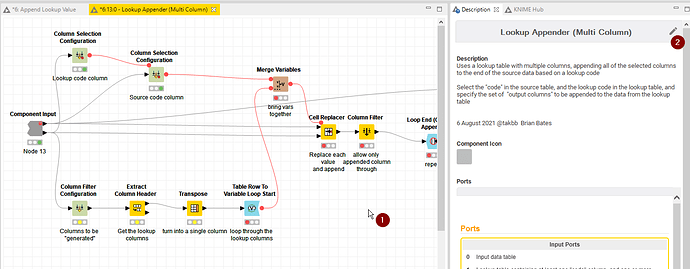
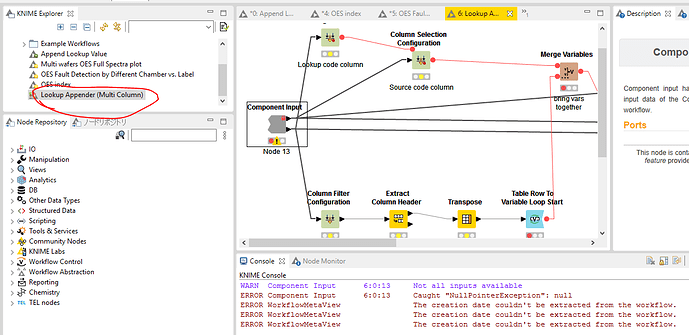
Hi takbb, thank you so much I follow your instruction for the 3 node lookup appender, I sucessfully add the info in the original data tabel, but I have a question for the component part I download your “Lookup Appender workflow” and it looks like picture below, but I don’t know how can I use it as your picture posted, to open the configuration page( for system/laber/chamber info), and connect with my workflow, could you pls help?
Hi bruno, thanks for your reply, but i am not faimilar with java script, if i use Column Expression, could you pls help to detail the code? In the future the 3 logic maybe not the same, i just put an example here.
The logic would be if “Info for config”= 123|456|789, then mark the new column(Label) as “NG”, else, mark it as “Good”. And repeat the logic three times, since i have to add new column System and Chamber, first time to raise a question, afraid of no reply so i post it serveral times, haha, you guys are so kind, won’t worry about that any longer.
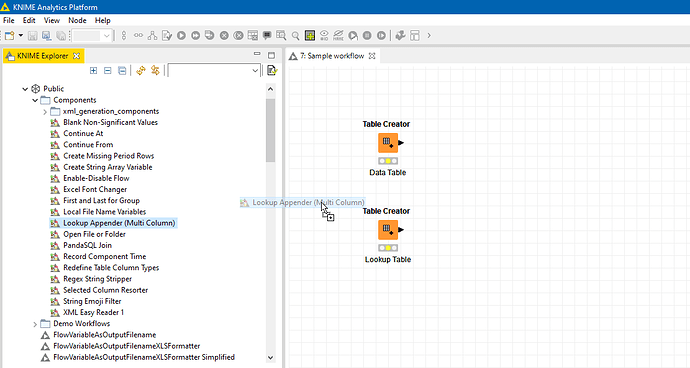
Hi @Turkeyhazel , rather than trying to “open” the “Lookup Appender (Multi Column)” component directly, you need to just drag the component from the Knime Explorer onto your other workflow:
Then you treat it like you would a regular node
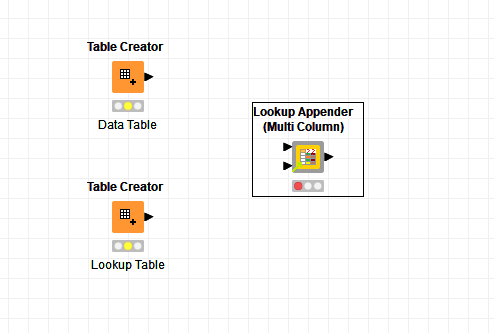
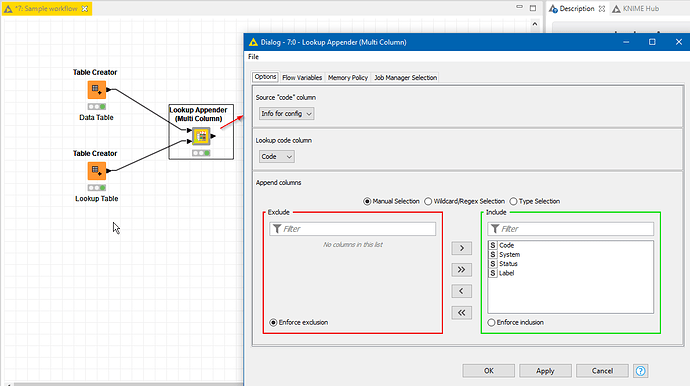
join it up to your flow and double-click on it to configure
You are of course free to open the component to see how it works, and modify your copy (improve it for your use case, or fix bugs  ) but the beauty of components is that provided it works for you, you shouldn’t need to look at the workings (unless you want to!)
oh, i see it really helps me , thanks you so much 

@Turkeyhazel , glad it’s useful to you,
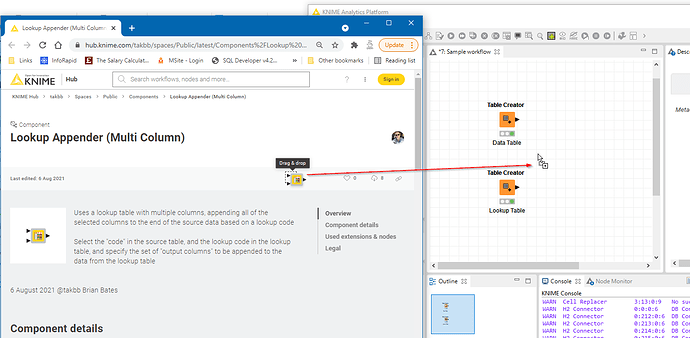
Incidentally, if you find the component on the hub, you can also drag and drop directly from the hub page into your workflow:
Hi @Turkeyhazel , sure I can show you a translation from Rule Engine to Column Expressions.
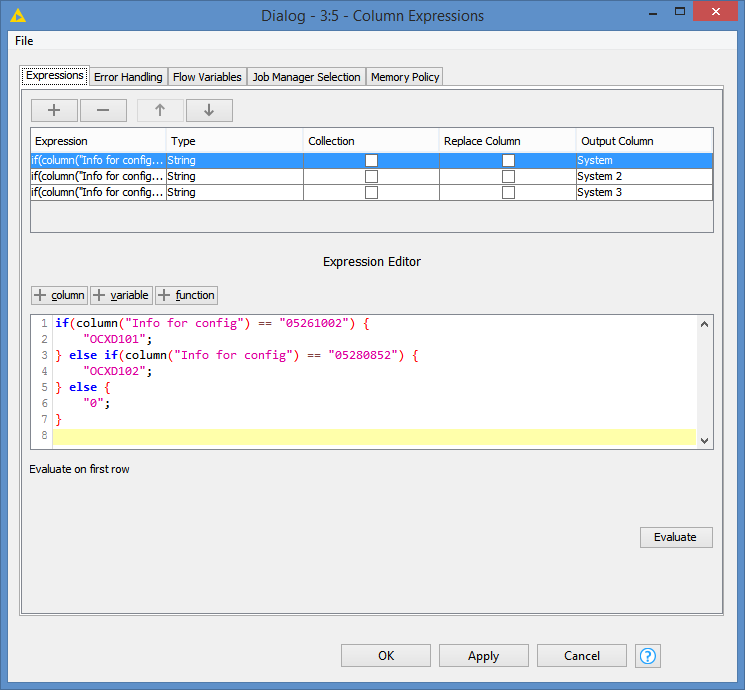
I put something quickly together to translate the 3 Rule Engines that you have into 1 Column Expressions. It looks like this:
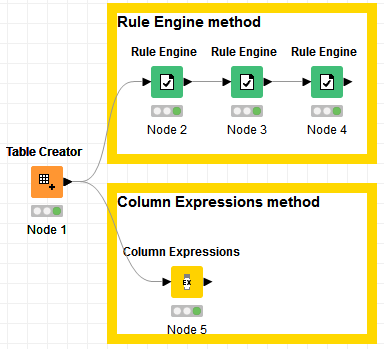
Input data:
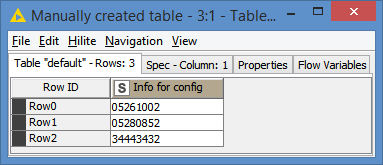
Both methods have the same results:
The Column Expressions configuration looks like this:
Detailing:
Since you want 3 new columns, you have to define 3 Expressions. The difference here is that you can define all 3 Expressions in the same node:
And you define the column names in the Output Column field:
For each Expression, you write the code in the Expression Editor:
For the translation, if we take you first Rule Engine for example:

In pseudo code, this simply means:
if column “Info for config” is equal to “05261002”, then return value “OCXD101”
if column “Info for config” is equal to “05280852”, then return value “OCXD102”
If none of the above happened, then return value “0”
Once you understand the above pseudo code, it’s a bit easier to understand it in most languages.
There are a few ways to implement this in Column Expressions, and there are a few ways that Knime can implement this logic in the Rule Engine also in the back-end, but in this case, the most efficient way would be to use if else.
And that’s what I did:

In javascript, a single equal = is used for assigning a value. For example x = “123” means x has the value “123”. But if we want to compare if x has value “123”, that’s where we would use the double equals == like if(x == “123”). In javascript, and in other languages as well, there are additional rules where you may require to use the triple equals ===, but I can’t really see this being needed in Knime because of some strictness that Knime already imposes on variable/column types.
For now, just get familiar with the fact that = is for assignment, and == is for comparison, and as you get used to this, you can start exploring further and understand the differences in details.
Please let me know if you have any questions.
Here’s the translation workflow:
Rule Engine to Column Expression.knwf (11.8 KB)
Hi Bruno, Thank you so much , I can write python code, from your expression i can understand the logic in java, that’s a quick and good way for me to get used to java script, you really sovled my question, have a good day, thanks~ ![]()
Hi @Turkeyhazel.
You inadvertently included a quote from my comment so I’m tagging @bruno29a as otherwise he might not be alerted to your message.
btw, if you refer to somebody in a comment, and want to be sure they notice it, you need to either reply directly to their comment, or type the @ sign ahead of their whole username. That way they get notified and are more likely to respond.
okay, noted thanks for reminding 
Thanks @takbb for the diligence 
@Turkeyhazel , I noticed that you don’t use the @ sign when writing to someone. It’s better to use the @ (like @Turkeyhazel) when writing to a user, that way it will tag the user and the user will receive a notification. It takes a few times to get used to it 
