For creating the PVC and mount to the Execution Context:
Create execution-additional-mount-pvc.yaml
apiVersion: v1
kind: PersistentVolumeClaim
metadata:
  name: additional-execution-mount-pvc
  namespace: hub-execution
spec:
  accessModes:
    - ReadWriteOnce
  resources:
    requests:
      storage: 50Gi
and run
kubectl apply -n hub-execution -f ./execution-additional-mount-pvc.yaml
Create a temporary pod for copying data onto volume:
Create mount-copy-pod.yaml
apiVersion: v1
kind: Pod
metadata:
  name: copy-to-pvc
  namespace: hub-execution
  labels:
    sidecar.istio.io/inject: "false"
spec:
  containers:
  - name: alpine
    image: alpine:latest
    command: ['sleep', 'infinity']
    volumeMounts:
    - name: additional-execution-mount-pvc
      mountPath: /data
  volumes:
  - name: additional-execution-mount-pvc
    persistentVolumeClaim:
      claimName: additional-execution-mount-pvc
and run
kubectl apply -n hub-execution -f ./mount-copy-pod.yaml
Copy the Schrödinger linux install file (.tar) to the persistent volume
kubectl cp -n hub-execution <path-to-tar-file> copy-to-pvc:/data
Delete attached temporary pod
kubectl -n hub-execution delete -f ./mount-copy-pod.yaml
Update relevant execution context to attach volume
Get list of Execution Contexts with
kubectl -n hub-execution get executioncontexts.hub.knime.com

Output: list of ECs - use the one with the Schrödinger nodes installed for in the next step
Retrieve JSON object for EC with (this command makes an ec.yaml file)
kubectl -n hub-execution get ``executioncontext.hub.knime.com/``<ec-id> -o yaml > ec.yaml
Modify the ec.yaml file to add the volume (add lines 9-15 under executor):
apiVersion: hub.knime.com/v1alpha1
kind: ExecutionContext
metadata:
  ...
spec:
  ...
  executor:
    ...
    volumeMounts:
    - mountPath: /external-tools
      name: additional-execution-mount-pvc
    volumes:
    - name: additional-execution-mount-pvc
      persistentVolumeClaim:
        claimName: additional-execution-mount-pvc
status:
  ...
and apply the changes to the EC pod
kubectl -n hub-execution apply -f ec.yaml
To install the Schrödinger software within the mount:
Using OpenLens, you can shell into the EC pod to run the Schrödinger install. Once inside you will need to unpack the .tar file and install the software. To test if this worked correctly, run a df command. You should see a drive available called /external-tools - move to it using cd /external-tools. Inside you will see the installation .tar file
Unpack the .tar file using
tar -xvf Schrodinger_Suites_<version>_Linux-x86_64.tar
This will create the Schrodinger_Suites_<version>_Linux-x86_64 directory.
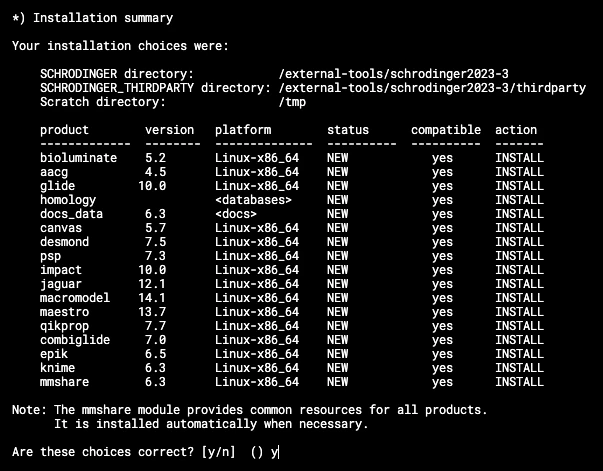
Enter this directory and run the install script using sh ./INSTALL. This will start the installation manager
***Notice we are installing the Schrödinger software a second time. The first time was outside the cluster to use the license server. This install is on the pod level for the workflows to reference.
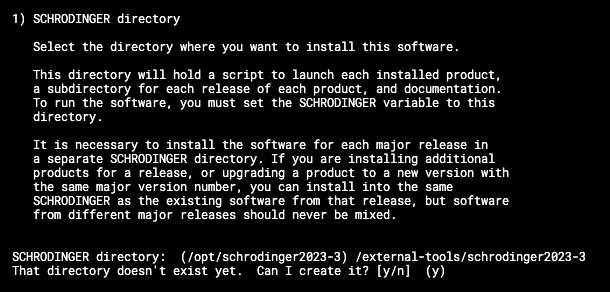
Change the directory value to /external-tools/schrodinger2023-3
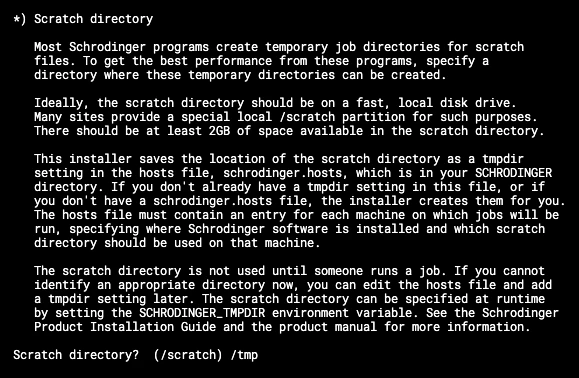
Set the scratch directory to be /tmp
Notice there is a KNIME AP install bundled here. It shouldn’t affect anything but you can remove it
Once the install is complete, check to make sure the SCHRODINGER environment variable is set with
echo $SCHRODINGER
It should point to /external-tools/Schrodinger2023-3
***Now Schrödinger software is installed on the persistent drive! No additional configuration is needed as KNIME will use the SCHRODINGER environment variable to communicate.
Connect the pod Schrödinger install to the Schrödinger license server
Last step is to make sure the Pod can reach out to the license server to authenticate and grab tokens for execution.
Run the following command to connect the pod to the license server (run this on the pod level)
$SCHRODINGER/licadmin INSTALL -c port@server
and were generated when you set up the license server.