Hi @jatinder_sondhi,
I believe I have some good news. I managed to get KNIME to connect to an Oracle Autonomous Database with the wallet.
There may be another simpler way, but this worked for me:
Download Required Oracle Files
Download Cloud Wallet Client Credentials
Download the required Oracle Cloud Wallet Client Credentials file and unzip it to a local folder. Hopefully you already have this, but details on how to download that can be found here
Make a note of where this has been unzipped to
e.g.
C:\apps\oraclecloudwallet\client_credentials
Looking in this folder you should see files looking something like this:
Download jdbc and associated security files
Download the file ojdbc11-full.tar.gz from Oracle. This can be found here:
At time of writing, the direct link to the above file is https://download.oracle.com/otn-pub/otn_software/jdbc/233/ojdbc11-full.tar.gz
Unzip the odbc11-full.tar.gz file to a folder
Into a folder such as “C:\apps\oraclecloudwallet\downloaded jars”, (this can be any name you like) extract the above file:
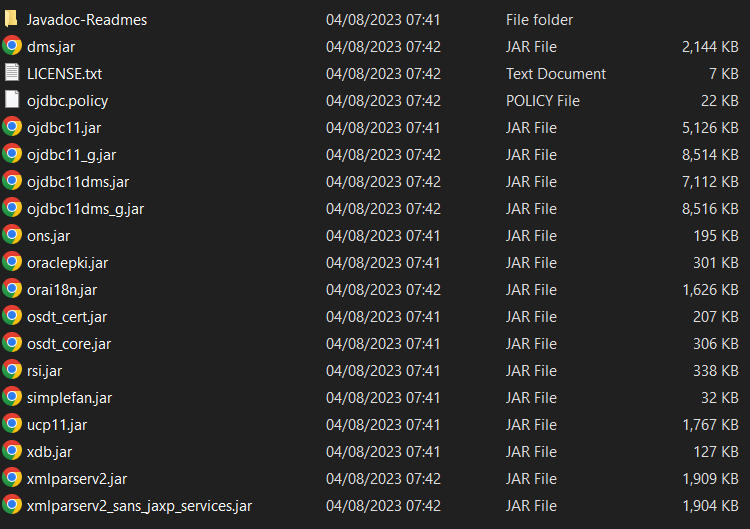
You should see a set of files such as this:
The important files in here that will be required for KNIME are:
odbc11.jar
ucp11.jar
osdt_cert.jar
osdt_core.jar
oraclepki.jar
so make sure they are present!
recap
So at the end of the above you should have two folders:
- Cloud Wallet Client Config folder
(e.g. C:\apps\oraclecloudwallet\client_credentials )
- Oracle jar files folder
(e.g. C:\apps\oraclecloudwallet\downloaded jars )
Configure KNIME
Download the Oracle jdbc extension
I’m not sure this is strictly necessary as we will be setting up our own jdbc for Oracle, but I did it, so I’m including it here.
I think you have already done this anyway, in which case nothing to do for this part, but if not, complete the below dialog to install the extension, and restart KNIME
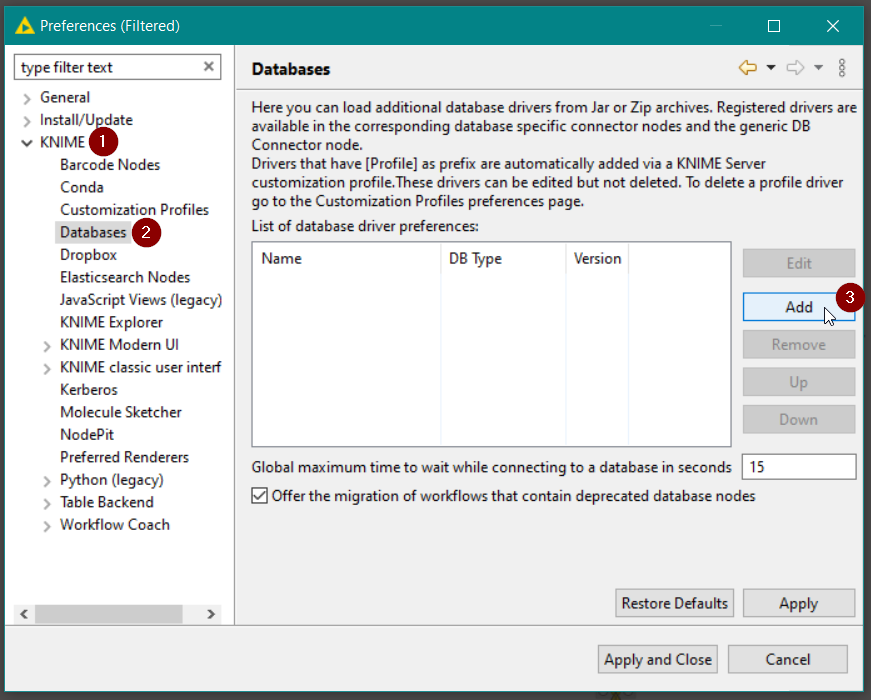
Add Oracle Cloud Database
From the preferences menu, select KNIME - Databases and then click the Add button
Enter the following information:
Notes
(1) Make sure you select “oracle” as the database type
(2) ID can be any name you want but mustn’t contain spaces. Just alphanumeric/underscores
(3) Name can be any name you want
(4) Description is anything you like, or can be left blank
(5) URL template is important, as this is what the Oracle Connector will use to find your wallet.
All of the following should be entered as a single line. Be sure to not lose any of the brackets! The only variable part of this is the location of the wallet directory. All other parts (e.g. <port>, <host>,<database> should be left exactly as shown as these will be replaced at runtime by the Oracle Connector.
jdbc:oracle:thin:@(description=(address=(protocol=tcps)(port=<port>)(host=<host>))(connect_data=(service_name=<database>))(security=(my_wallet_directory=C:\apps\oraclecloudwallet\oracle_client_credentials_wallet ) ) )
I don’t think it matters if you use \ or / in the folder entry for my_wallet_directory. I tried it both ways, but if in doubt you could replace it with /
(6) Click Add directory, and then choose the folder that contains the extracted files from odbc11-full.tar.gz
odbc11.jar
ucp11.jar
osdt_cert.jar
osdt_core.jar
oraclepki.jar
e.g. c:\apps\oraclecloudwallet\downloaded jars
(7) Finally click Find Driver Classes, and it should find oracle.jdbc.OracleDriver. If it doesn’t, it most likely would mean that the odbc11.jar file isn’t in the folder you specified, so check your selection.
Press OK on that dialog, and then Apply and Close.
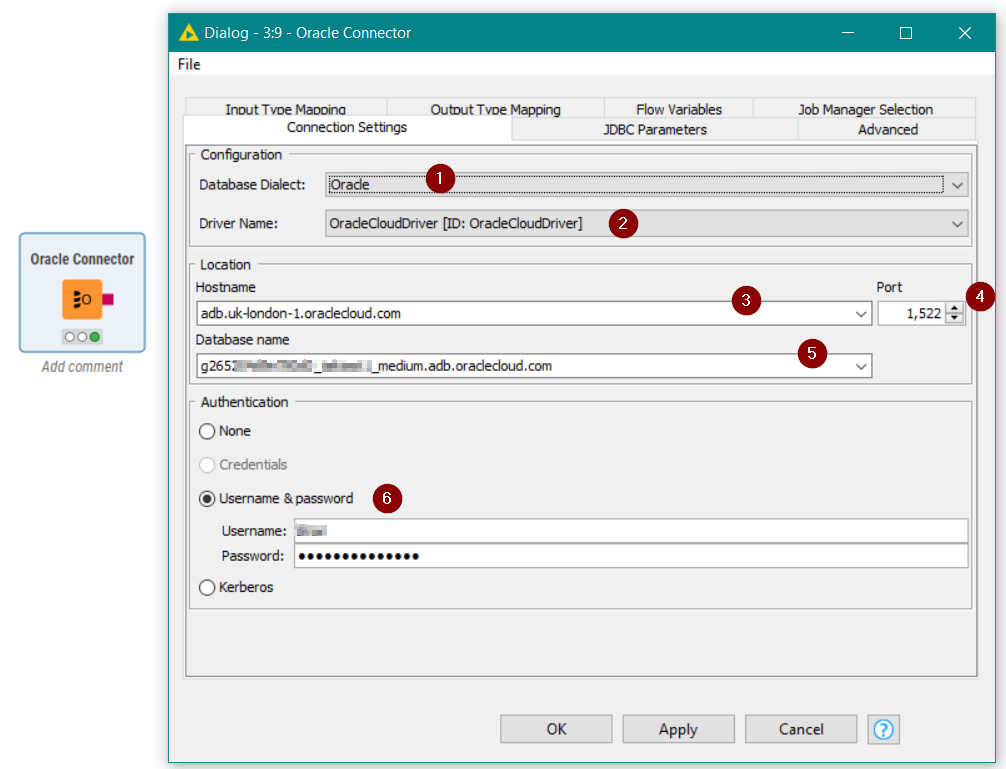
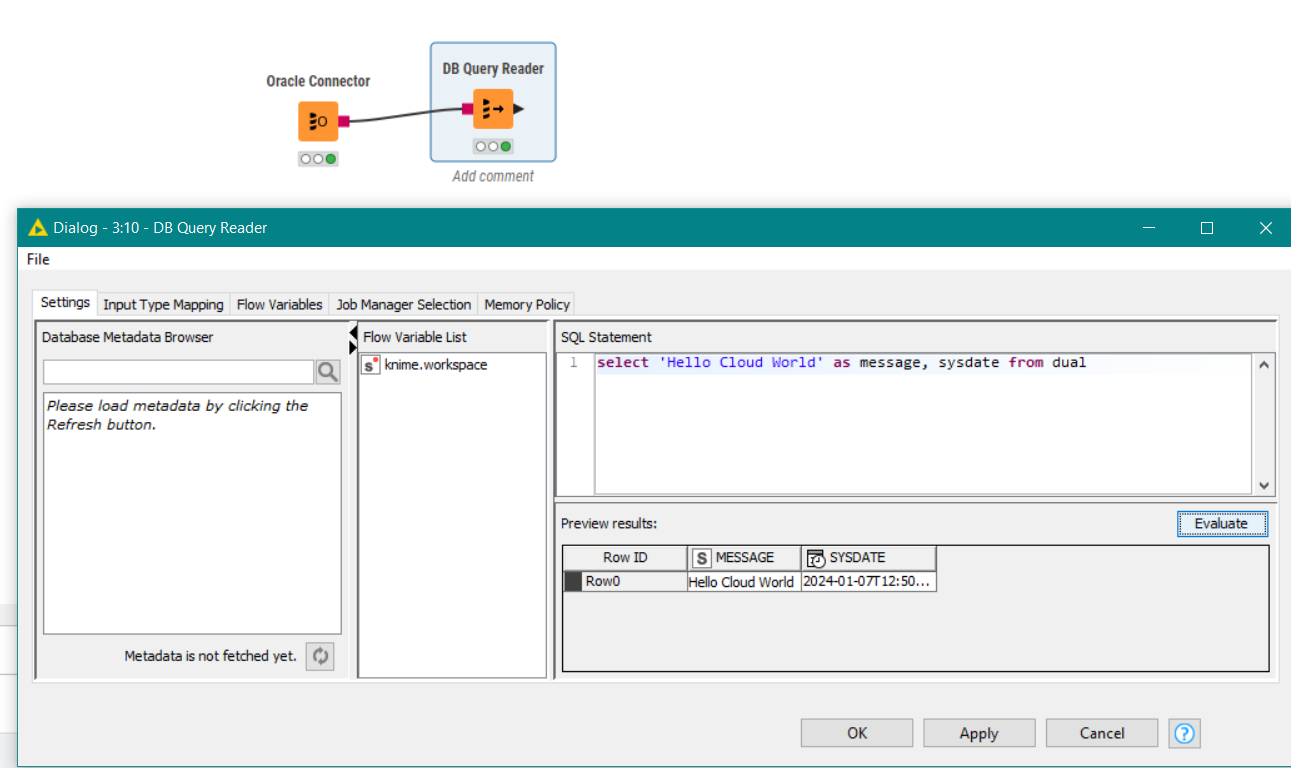
Oracle Connector
Configure the Oracle Connector
Drop the Oracle Connector on your workflow
(1) Database dialect should be Oracle (as it is the Oracle Connector, I think that is the only option!)
(2) Make sure you have chosen the new Driver (e.g. OracleCloudDriver) as the Driver name.
(3) Set Host according to your database
(4) Set Port (e.g. 1522 for mTLS and 1521 for TLS)
(5) Set Database as your required Oracle Service name
(6) Set username and password
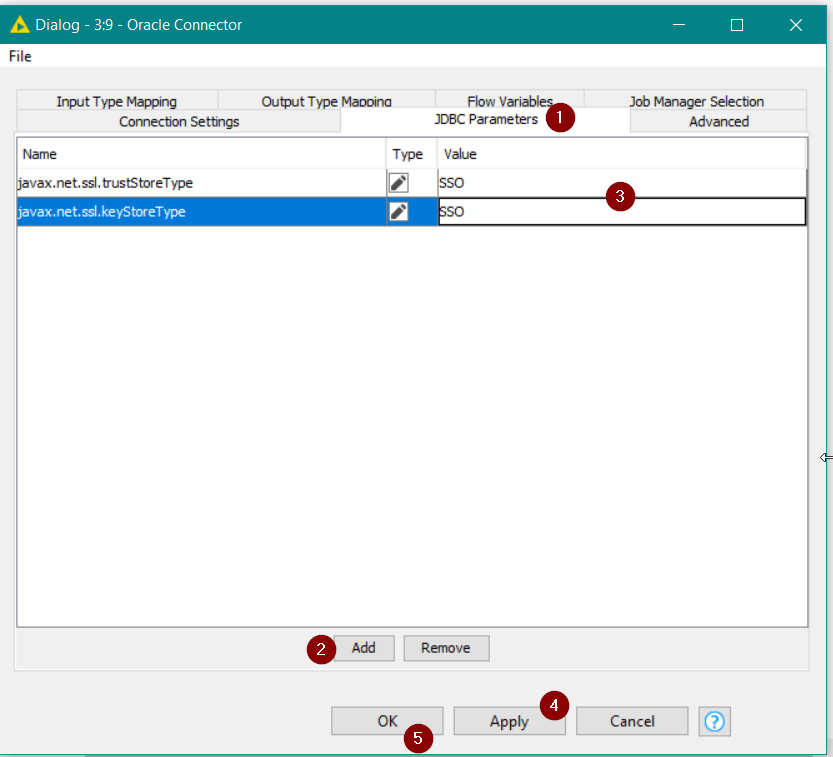
Now, according to Oracle the following JDBC parameters are required:
javax.net.ssl.trustStoreType=SSO
javax.net.ssl.keyStoreType=SSO
I found I didn’t need to add them and it worked. If you do find you need them, add them on the JDBC Parameters tab as follows:
(1) JDBC Parameters tab on Oracle Connector
(2) Click Add
(3) Set Name and Value
(repeat 2 and 3 for second parameter)
(4) Click Apply
(5) Click OK
That should be it if I haven’t forgotten any steps or mis-typed.
Good luck, and let us know how you get on.