is it possible to provide the user (webserver) with an interactive option to create a customized assay-table according to some pre-defined columns/values.
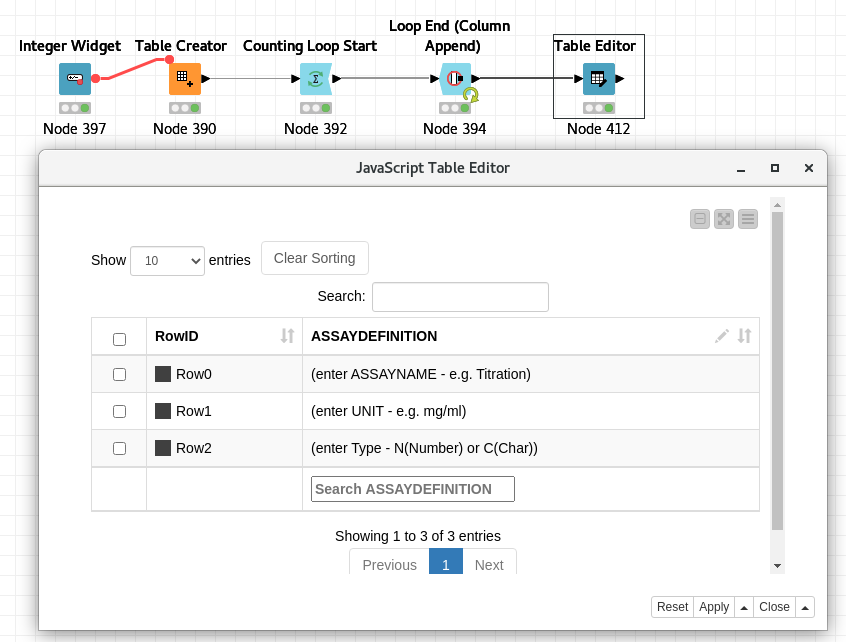
Something like an Interactive Table Creator, where the following template is displayed:
The user can modify the different fields by entering a value (e.g. Assayname) or selecting from a dropdown menu in the field (e.g. Type). He can add or remove Columns (not rows these are pre-defined) by e.g. clicking on a + sign.
The resulting table would look sth. like this:
I am not sure if sth. like this is possible.
Not exactly the same but sth. similar has already been asked for:
Here’s something to start with. First of all, it’s hard to build something that would have the exact UI and interaction that you mentioned, unless perhaps JavaScript could do.
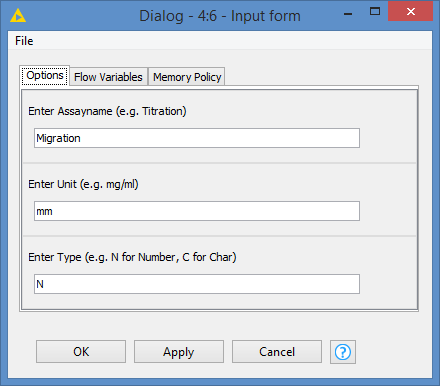
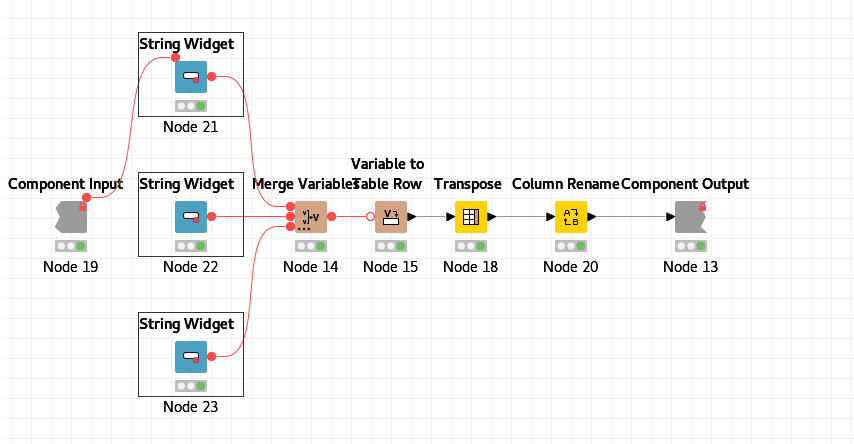
I built something that does not have the same UI but that could do what you are trying to achieve. I built an input form like this where I entered some values:
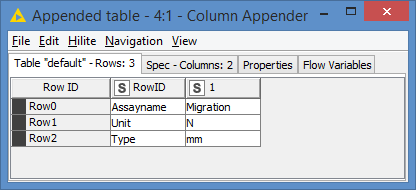
Once this is submitted, I append these 3 values as a new column using the column appender node:
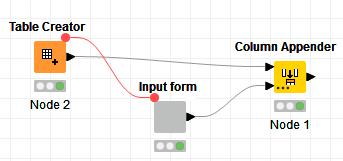
The workflow looks like this:
This can be added within a loop with an additional interaction box to ask if we want to add more columns or not.
The biggest challenge with loop is being able to pass back the data, and the only loop that I know of that allows data to pass back is the recursive loop. However, the problem here is that the loop will complain because we are changing the structure of the table (appending columns). If we were adding vertically instead of horizontally, the structure would not change and the loop would not complain.
Here’s the whole workflow that contains the first PoC (Proof of Concept) and also the attempted loop with which you can play around: Interactive Table Creator.knwf (41.3 KB)
Of course, we could always add vertically and then manipulate the data (transpose) at the end. I’m too tired to try this lol
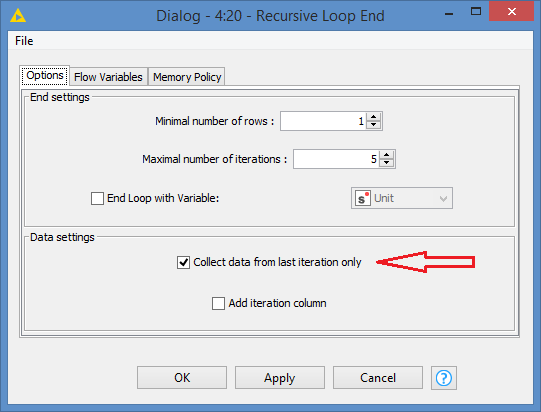
Actually I figured out why the loop was complaining about the structure. It’s because of this setting:
By default it’s not checked, so it was re-appending all the columns at each iteration. With this option, it appends only the column from the last iteration, which we want.
Note: Of course, you have to run this from the front end (web portal) to be able to enter different values. If you run it in the back end, you will not get the interaction in between the iterations, and will therefore generate the same values.
And of course, you can modify the loop and add an additional interaction to add more columns or not. In my example, I did 5 iterations. For the additional interaction, you would then use the option “End Loop with Variable” and parameterize some conditions.
many thanks for your reply and the workflow and most of all the work you put into it. I actually did not expect a solution so close to what I needed. Really great!
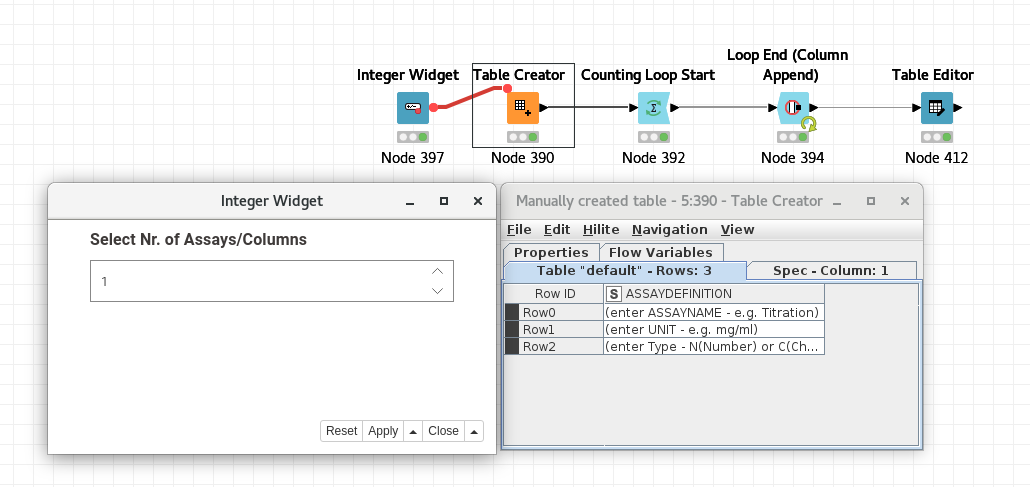
Just to recapitulate on what I tried before your suggestion:
I used two Widgets but outside the loop.
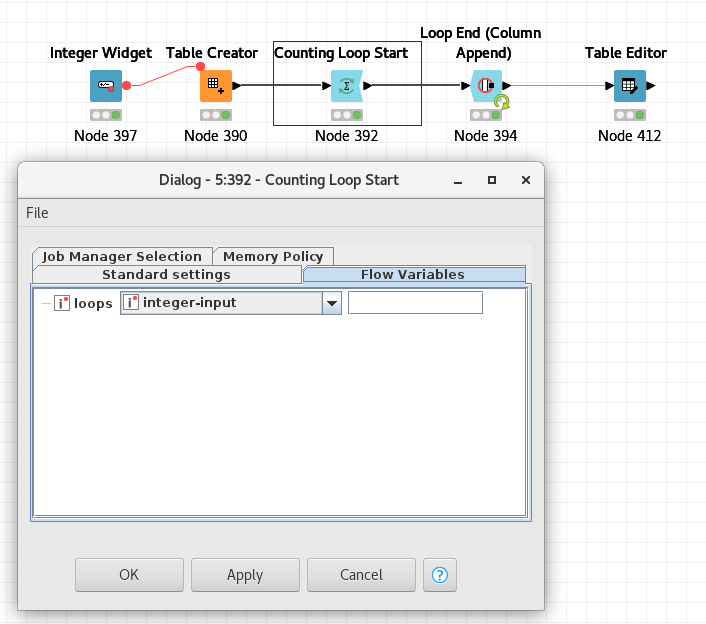
The first Widget allowed to define the nr of columns (assays) needed:
I was not that satisfied with my solution so I am very happy for the workflow you provided using a component within the loop.
As I do not have access to the Webserver yet, I tried to replace the configuration nodes in your component with the “respective” Widget nodes and tried to change the column values each step using the Step Loop Execution but that did not work.
Would actually be nice to have the option in the configuration of the loop nodes to let the Interactive Views of Widgets pop up automatically each iteration (there might be a good reason that this is not possible).
I still do not really understand the difference between the Configuration and Widget nodes (need to re-read the manual). Some configuration settings like for the “String Configuration” node and the “String Widget” node look quiet the same so I was wondering if you could just have one of these nodes with both properties (e.g. being displayed in the configuration of the a component and the webserver plus the option for interactive View).
Again bruno29a many thanks, your workflow is a great solution and I will work with that and try to implement your suggestion on the “adding more columns” option during the loop
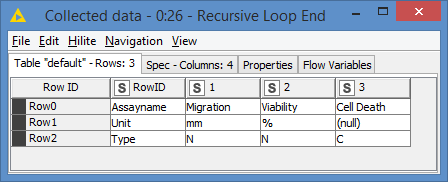
I have come up with a way to have interaction when running in the back end using Java popups, and this is the output that I get:
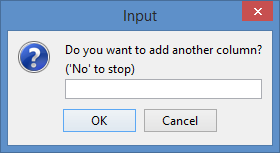
I also implemented a dialog which asks if you want to add another column:
Basically I only check for “No” (case in-sensitive), so if you want to add another column, just press Enter or click OK without having to enter anything.
Note: This will work only for the backend. These dialogs do not work on the front-end (webportal).
perfect, this last workflow is actually what I wanted to achieve and I was able to integrate it smoothly to the other parts of my workflow.
One last thing… (I know :))… It is actually a bit “sad” that these Java popups/ dialogs only work backend. If you don’t mind and as I have to transfer this workflow at one time point in the future to the webportal I would like to ask what would you suggest to translate the last workflow to have the dialogs compatible with the front-end (e.g. use configuration nodes or components as in the second workflow of yours)? Or maybe I did not understand you correctly at the beginning and the second workflow actually does exactly what the third workflow (java snippet) does when transferred to the webportal? Sorry if I am a bit confused on that part.
Again many thanks. These workflows are big leap forward for me…
Hi @Anjo , the 2nd workflow should work on the webportal (you’d still need to add one more interaction to ask the user if the user wants to add another column or not as I did not add this to the workflow).
A bit more details:
The 2nd workflow should work on the webportal as the workflow will wait for the input form to be submitted before continuing, and this form should appear for each iteration of the loop.
The reason why this does not work on the backend is because you don’t get a screen for the input form unless you click on the interaction view. Unfortunately, you don’t get to do this (click on interaction view) for each iteration of the loop, hence why I used the Java popup dialog, because it’s the closest thing to simulate such interaction within the loop, in the backend that is.
Technically speaking, with some modifications, you could use BOTH solution. You could for example integrate both and do if one input is empty, use the other input. I can’t build this as I don’t have access to a server at the moment, but in theory it should work. I did this a few months ago when I had access to a server, but not for input, only for displaying a message, which is way less complex, but it should work the same.
nice idea to integrate both solutions. I still have to wait a little bit before I can try my workflow on the server so for now I am really happy with the “3rd” solution But it is great to see what is possible and have the several options at hand when it is time for the intended transfer to the webserver.